For my game, as I have described it as being a run through history style game, I am going to take you through the process of my 3D environment and the moments where things hopefully go right and record the situations that go wrong to further emphasis my development for this creation. I felt that for the purpose of my 3D walkthrough I would do a rather desolate, torn up battlefield, which is reminiscent of the characters home village in my games story, which is also related to an environmental image that I produced for my concept art as pictured below:

The environment that I am referring to is the image on the far left, that i want to make as the starting environment for my game and the character’s home village but in the far right image, I would like some form of an emotional attachment between the character and the player/audiences when the final moments or battle (spoiler) takes place in his home village and he completely demolishes his village and it’s people. My vision of how the final battleground will look of his village is the image depicted on the far right of this image with the tombstone and the initial mask hung on it to mark his “death”(spoiler: remember he’s immortal), this will a desolate waste land afterwards and the image is fairly accurate to that point, but i’m go to add a couple of buildings and maybe some destroyed huts. I feel that this will add a level of concern laced with upset because as this will be the final resting place for the character it will bring that home feel effect to the game and allow the player to become engulfed in regret as they will feel like they are the character and are responsible for destroying the village and the people he once cared for.
In the first stages of my creations, I am going to do just a couple of huts or miniature houses, but I’m going to start with the main building, which in the story is used for just about anything, that could include Church, Gathering Hall, Meal Room Etc. Also I am going to be including cut scenes between gameplay in which it will present certain moments in the character’s life and this will include the character’s parents and you’ll discover that his family are the more “dominant” family in the village, so he spent his childhood in the upper floor of this main building and his parents protected the village shall we say. This included killing anyone who didn’t agree with their rules or stipulations for the residence to remain there which is where the character (Calous Kayne) get’s his aggressive and murderous nature from.
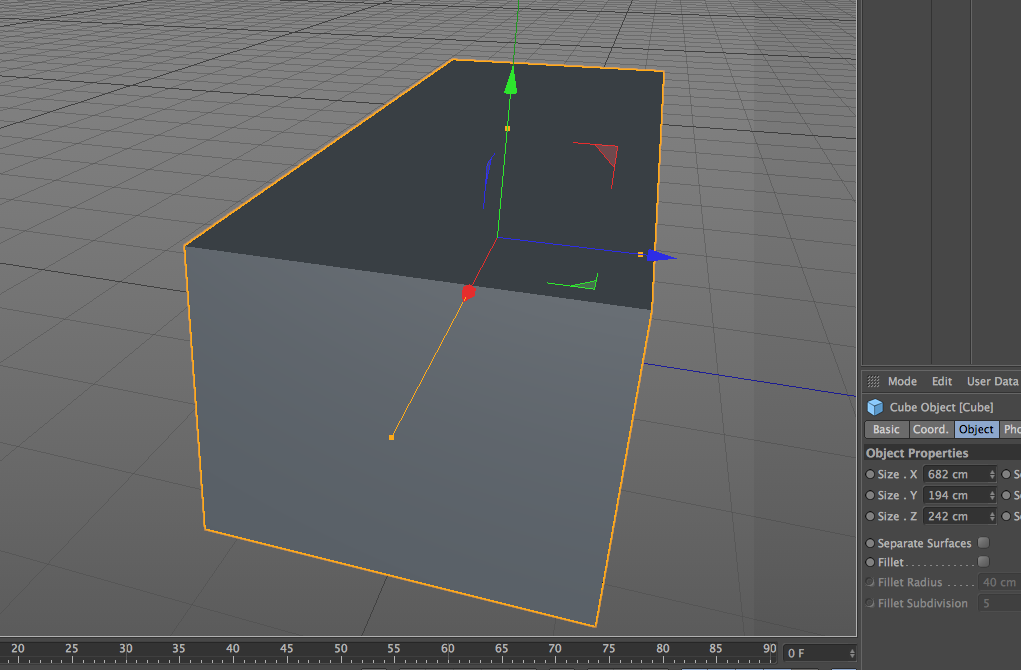
To start the creation of the family home I have started with a simple cube and changed the dimensions of it from 200cm on the X,Y,Z axis to 682cm on the X axis, 194 on the Y axis and 242cm on the Z axis to create almost a cubic rectangular look for the main hall. This is pictured below:
After that I added another cube behind it but at an angle of the other cube now rectangle and left that at the size that it is for the moment.

The next stage is to start adding more structural features to the building and because I want to make the game unique in it’s on way, I’m not going to set a particular time period at this stage for the simple fact that between the 1000’s to the 1600’s were quite similar and the building structures never really changed, but for an initial building that will be almost destroyed I want to let the creativity just run it’s course for now. I will provide images of my project as I’m creating it.

Using the “Light Bulb” tab I selected a “Target Light” and dragged it over the first piece of structural alterations to enhance the piece that i have already done, I haven’t quite worked out what exactly I could use this for, but I have a rough idea in just making a back ladder of window sills with some foliage which could be used to incorporate the parkour side of the game which is again similar to the Assassins Creed series.

Here is an update from the previous image where i have added six windows and ledges that will be perfect for the parkour free roam element of the game and will allow for a bit of fun in the game as you could do what they do in Assassins Creed and run up buildings and discover secret entrances into the building that your character would have built, being already built into the game before. I’ve already added an effect to the building by giving it a glass see through layer to the windows for a good start point.
I have altered a few pieces since the last image and this includes colouring and effect add ons into my buildings exterior and the first one was of the image above that is essentially the back of the building that will just be rooms and possibly an attic. As you can see I have used a rendered image to demonstrate exactly how it will look hopefully in the finished product.

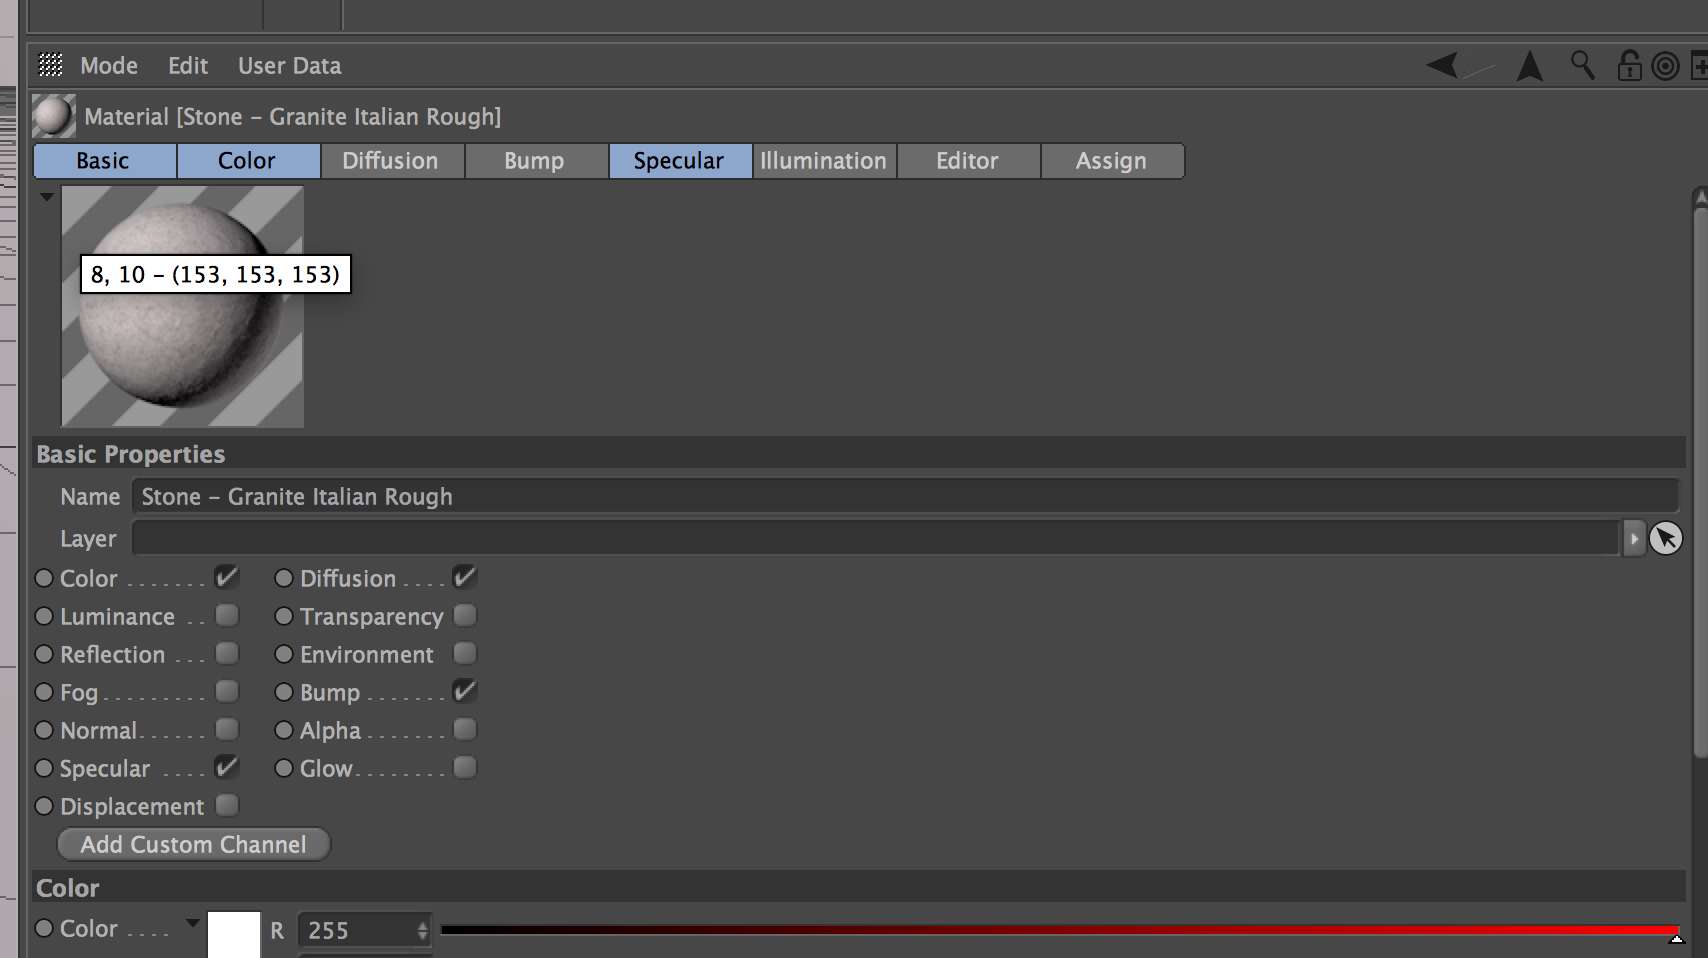
I’ve used a dark wood colour to provide an original effect and changed the settings to “cubic” as it gives the texture a much rougher effect and as you can see it makes it look ten times more authentic rather than solely animated. In addition I have used a stone/granite type of material for the wall which from the periods of 1000’s – 1600’s was pretty common for the structure of a house or building either that of they were stone and hay/straw. I feel that this works well, not only historically but give’s it a more distorted exterior which is what i am looking to achieve really because even the best architects wren’t that perfect with there building.
Here is another look at it from the construction screen and the menu that shows the materials that I have used.


I know that from looking at the final piece of this wall that all the textures, lighting and materials are looking great and should hopefully become the final materials for the building but I will see how it looks after I’ve experimented with other textures. Here is the finalised angle of this backwall as i have now applied the final textures and effects.

The next task for my buildings exterior is to alter the main cube, which is were I’m going to add a small roof with a possible exit on the top which could be another entry in your bedroom and another element to the parkour aspect in my game.
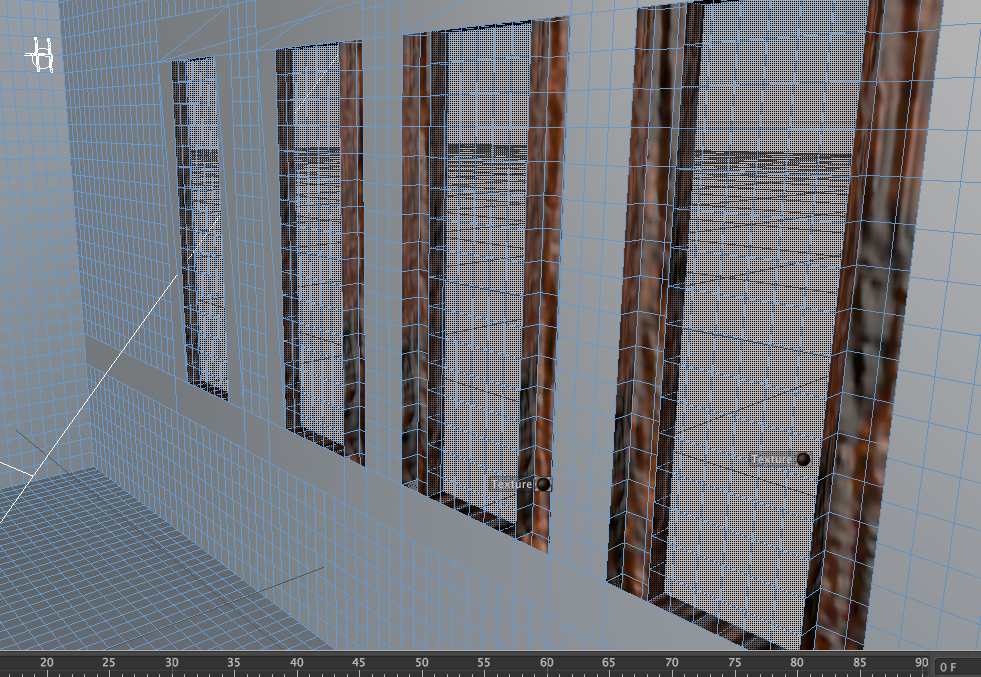
Firstly I have started with lower windows for the bottom floor that gives the family a good view on the other residents of the village and there are also some larger windows on the right side of the building when your looking at it from the front for a good view from above incase of attacks or to see the sky. Here’s a view at the lower windows.

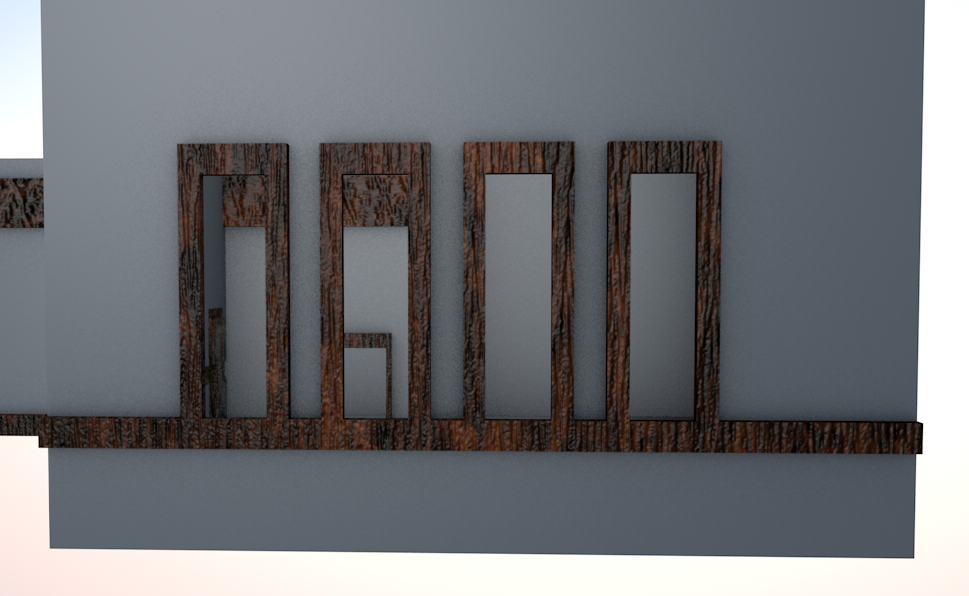
Too improve on this I then made sure that the measurements where how i wanted them to be and then I added the same colour and texture that was used for the wooden plating on the back wall in the previous images. In the image below I have now added glass to the windows and finalised the wooden designs that surround them, the only concern is the interior because of where i have extruded the window panels the inside has popped out and it looks all distorted inside so I need to think of a contingency idea to over them up. You can see in the image below that the issues that I have with the interior. I have ultimately decided to do all the wooded areas and structural segments to the building in the same colour and change the interior designs and exterior.

Here’s what they’ll look like in rendered mode.

The finished pieces look really good in my opinion, the only thing I think I need to work on in the final stages is the glass on the windows to actually give some form of a reflection or do it so that it allows light to bounce of it but at the same time be able to let in light and cast shadows inside aswell. Glass was a rare element back in the old days so the house itself will be almost a place of fortune as they rule the village and are in league with the higher powers that be. This could be a fantasy element that i spoke of in one of my previous reports where the game is historically based but with segments or elements of fantasy or something that looks better but seems out of place in that time period.
The next part of the building is on the right of this image and around the corner which are the larger panel like windows that I mentioned earlier that I wanted to include as almost a star gazing window. There will be a centre platform in the middle of the room similar to the style of a pirates view platform and from the stairs in the back, that allows you to see the distance and this will be made as a part of the game so that the characters family can keep an eye on the enemy villages to monitor attacks and the other residents.
Here is an image of the initial windows, there’ll be four to allow optimum vision and clear sight over everything.

I will expand on this by adding the exact same textures for the wooden frames and glass panels, but again the issue lays on the inside which is where I have extruded it and have cause to impact on itself which means it has left spaces so what i think I will do is use the bridge tool to cover over the various holes and possibly just extrude the inside to either equate the exterior or to just give the inside a bit more definition.
Here is an image of the windows in construction mode and with colour added and textures swell, but underneath that is what the inside looks like and presents the very issue that I have to find a way around.
You can see my developing issue, but I think I may have found a solution to this problem, I will just use the bridge tool and cover over the spaces and use the extrude tool again to reverse the effects to the inside of the window therefore not letting the window look ugly or odd when it’s rendered like this.

It doesn’t show up very well through this image but the indentations are there. If i can redirect your attention below to the new and improved windows as I was able to work out a way to cover up the gaps with the bridge tool which has proven to be very effective and even add in some extra detail that I am quite satisfied with and it adds that little bit more of an environmental texture to the interior.

Here’s an image of it the construction mode, check it out in the rendered view.

It doesn’t look like much right now, but once the textures and colours are added to the frames on the inside then it will really start to come together, stay tuned for the final pieces once the textures are added.
For now though allow me to direct you to the lower windows on the front of the family home, I had the same issue with the indentations on the inside once the extrude tool was used when I was creating them, but where I mentioned before that using the bridge tool I was able to do something pretty awesome with it, I managed to make roofing for the windows only to cover the indentations elsewhere but it turned out to be something that I think I will keep now just for how good it looks on the windows.

Here’s a view of them rendered.

You can see where the adjustments have been made and they look great and work very well for what my building is and the general time period that it is set in, which works very well for me and as I said before it makes that little bit of a difference considering to the effect that it has and once the textures are added then it will look even better guaranteed.
I have finally added the textures that I want on my windows and given that little bit of life that they needed. Here are the finished pieces.
Obviously there is still a lot more to do than what is depicted above, but what I am doing is to go part by part and get it all connected together at the end and have the final piece ready for show.
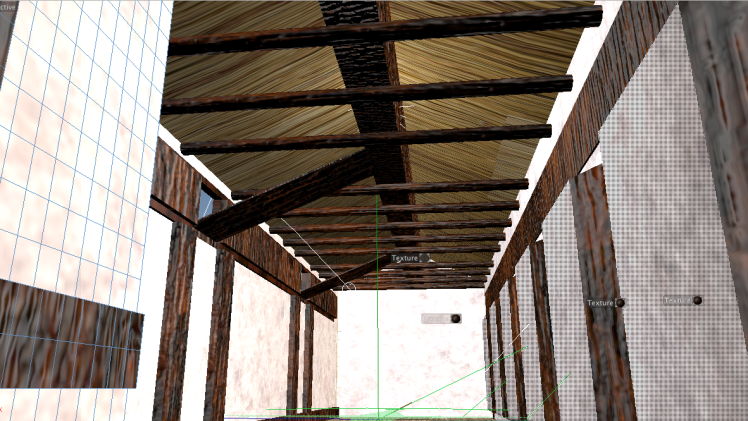
The next part of the building that I am tackling next is the roof for the main hall as I knew that this would be an awkward situation so I have left that till last for the more awkward parts to the building and it will sit well with the surrounding environment as it will look very rustic and quite basic for obvious reasons due to the limited amount of materials that would have been around back in the 1000’s to 1800’s time period, we didn’t really start to evolve in architecture or building materials until around about the 1600’s when you had Kings and Queens or any higher powers back then that demanded a classier, distinguishable and expensive design and items like Glass, Hay, Clay, Bricks and different types of wood started to be discovered. Regardless of the building being in the future as it’s destroyed at this point, it still needs to look very basic but affected by the elements with rot and decay, anything that makes it look grimacing at that stage in it’s life.
Here is an image of the current state of the roof, what I have done so far is extrude segments of four and bring them up much like stairs and then bridge the gaps using the bridge tool and straightening them out later on, I am considering though to leave them a bit crooked for more of an impact on the home in the future.

As you can see it looks much like a set of steps at this point, primarily so I can bridge them together and smooth it off once it is covered, I might make the roof with a straw or hay like texture rather than wood, I will get photos of them both and try to determine which texture looks the best for it. Meanwhile, I as you can see on the other side of the building that isn’t pictured I have already bridged some of the gaps and here’s what it looks like so far.

It is coming along alright for now, but I have to say that I have some concerns about this as the stairs are fairly uneven which is great for when it’s finished if I want to make it look distorted but whilst I’m still in the construction of it, it’s not to helpful at this point in time for levelling and making sure everything is even.
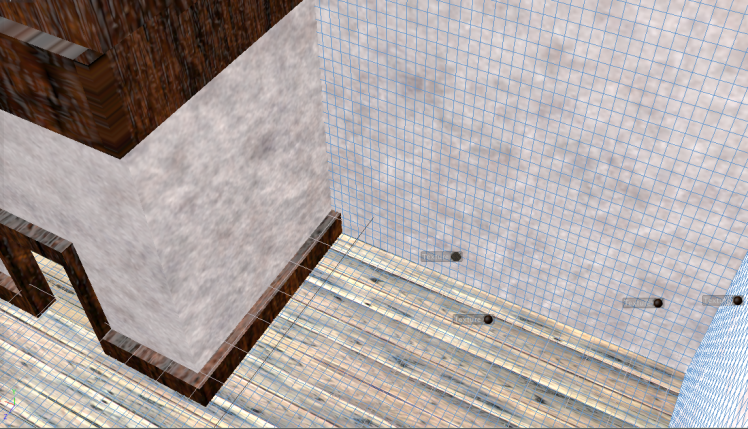
Here’s an image of the roofing that’s on the back of the building.

I know that this will look great once it’s finished and rendered as the back of the building already looks good and I’m considering putting in an attic in there that connects to the other part of the building and and could even be a bedroom of my character. The next thing that I had to do was to edit the interior of this section of the roof especially if I’m turning it into a room, so I am going to delete the inside pieces of the walls and start adding inside textures.
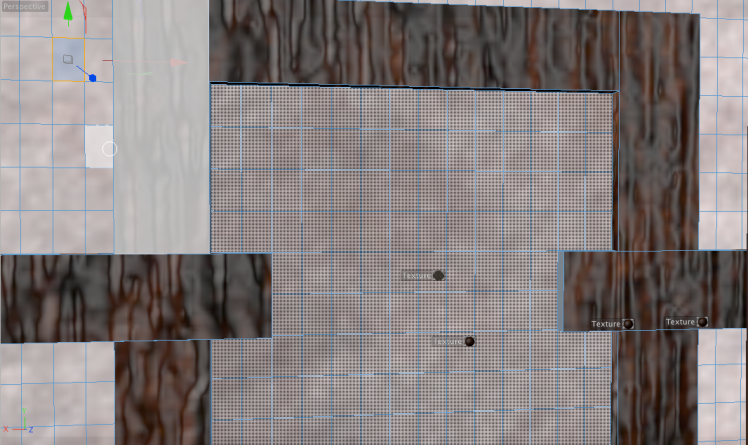
Here’s what the room looks like now that the panels and various other annoyances have been removed.

Now it’s time to add the textures and finishing touches to this room.

I deleted polygons on this section to create a doorway into the room this will almost be a room en suite, I am thinking of changing the floor style, so maybe a different style of wood or a rug. Below you’ll find an image of the new flooring that I’ve added to the room.

I am going to add a desk in there almost like a office for him to write and potentially a safe room but that will be made later on. For now I am going to go back to making the roof and finalising that.

Here is my roof with a basic texture at the moment, what I did to get the texture for now is I went onto google and retrieved an image of straw and dragged that onto the highlighted sections of the roof, but I appear to have developed a problem with it that it looks really distorted and jagged which is certainly something that i will need to work on.

After a bit of tweaking about with the settings I have been able to determine what was wrong with the way the texture was in the last image, it was set to a large offset which is why it looked quite blockish aswell, but it looks a lot better now that i have altered the offset and changed the look to cubic giving it downward look and allowing it to look a bit more authentic my only problem now is though is that it doesn’t quite look as rough or as straw like as it could do. Needs more improvement to it.
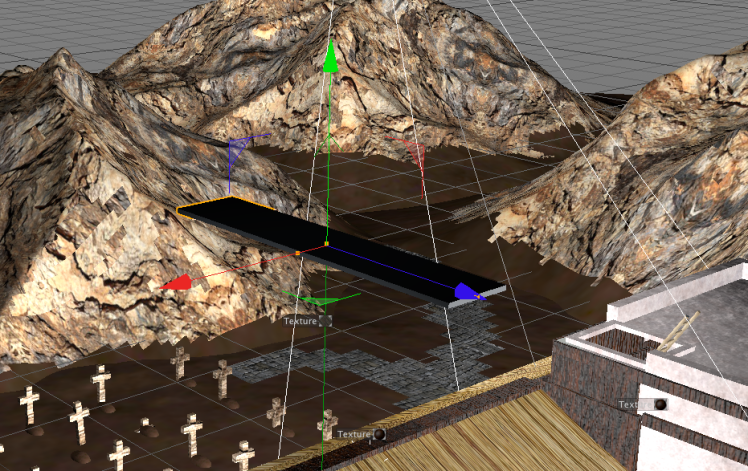
The next part to this is the bridge structures that connect to the main walk way that reveals a secret hatch at this end of the building, which can be used as another way to get in and out of the building. The walk way has been constructed prior to this point so there are no detailed images to back up this part, but I used some of the inside walls and deleted the rest and kept the centre beam and used the bridge tool to make a floor and I added a wooden texture that is similar to what has been used on the building in general, I may need to add a light inside as it doesn’t look very well lite up inside, but it is still in the planning stages, here is the evidence of the walk way, which I would like to connect to the outside ledges on the side of the building.


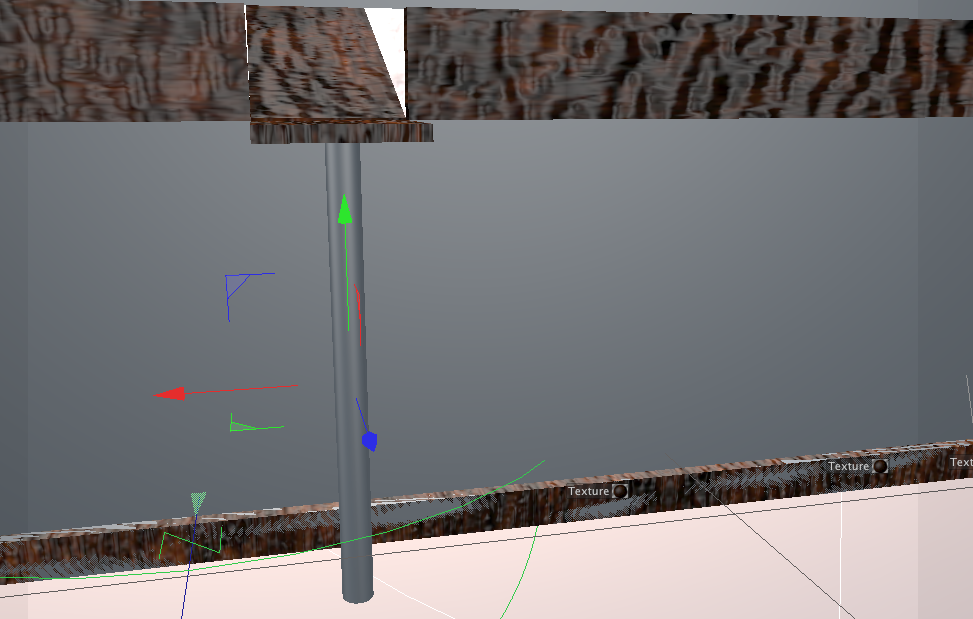
As you can see it does look pretty basic but i am impressed with it, I’ll hopefully be able to adapt it and create more walkways of of it. the next item on the agenda is actually quite simply a ladder that leads up to the attic and unfortunately again I have created it and forgotten to take photos of the stages but I got a cylinder and shrunk it down and extended it to suit the height that I needed for it and I have been able to duplicate and for the steps I just duplicated one of the sides and shrunk it down then duplicated them after turning them around and then added the textures. Here is the only image of the construction of it.


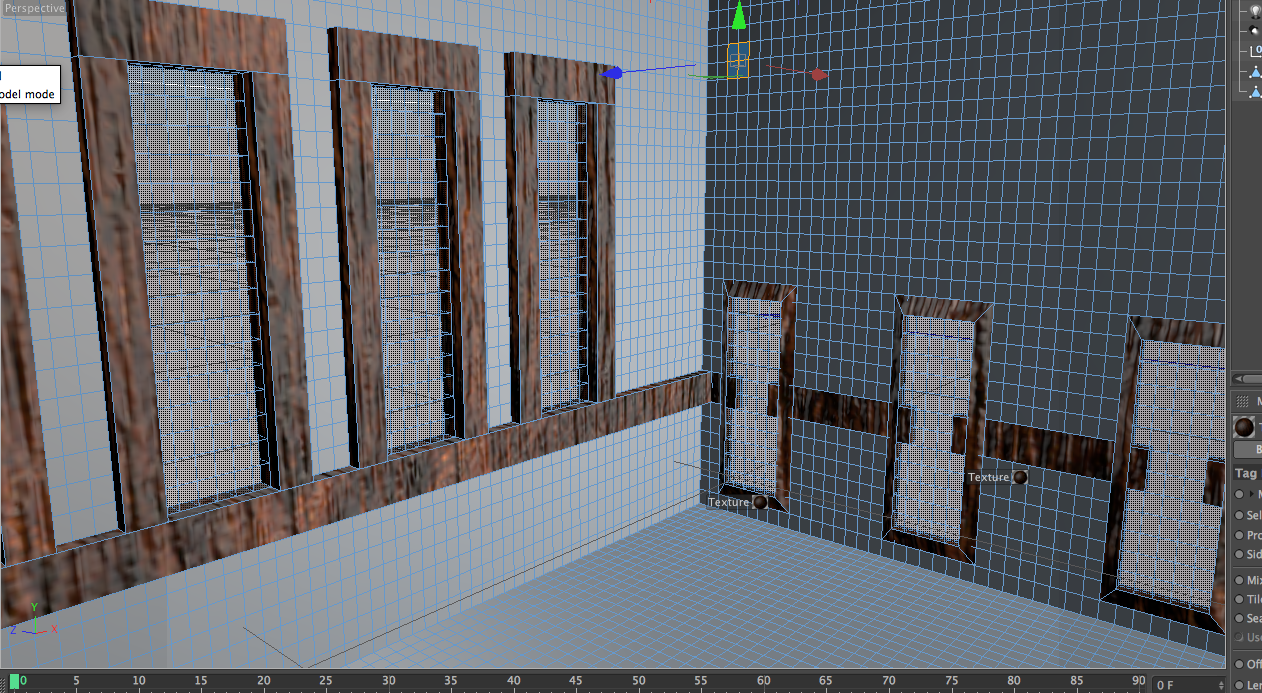
The finished ladder looks fairly authentic and very well constructed but the texture I’m a little uncertain about. The next thing is the windows behind the ladder because after using the extrude tool to bring the windows out, it left gaps again so I have had to bridge over the gaps again and refill the texture as you can see below.

There is the construction view as I have added the panels to the windows and made them look fairly unique compared to most windows back then.

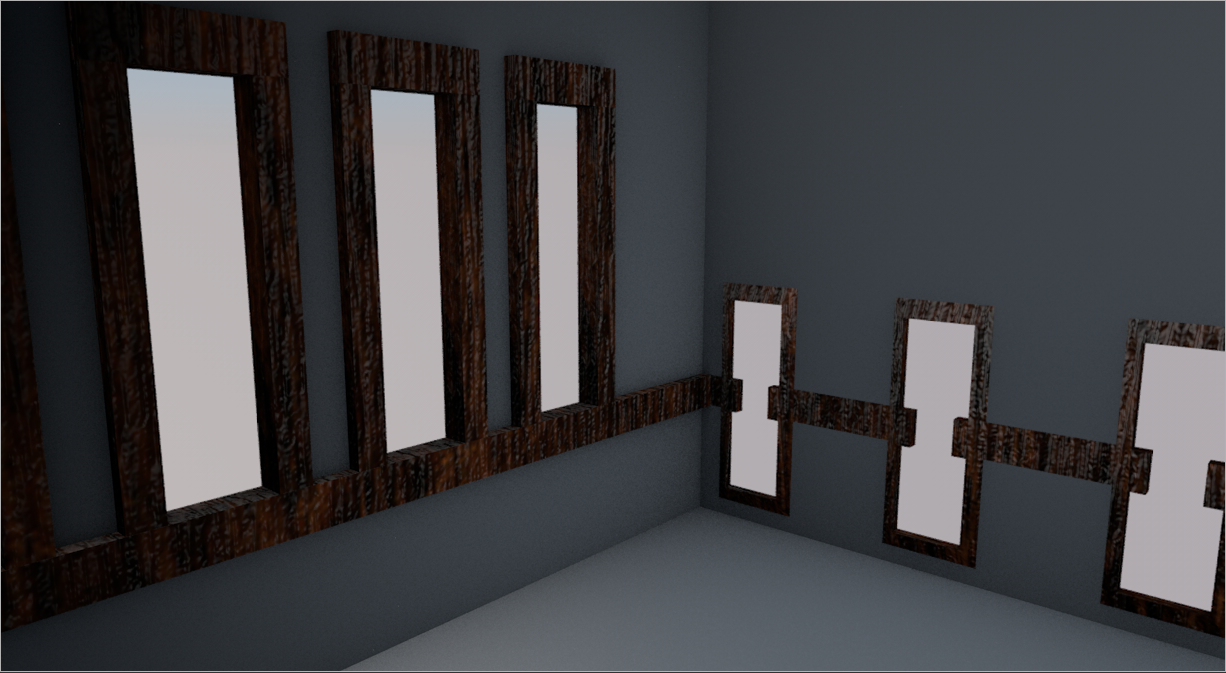
Here is the completed windows.

The next task was to finalise the surfaces and textures inside the building as it is important to get them sorted so that the furniture can be placed inside, the furniture is going to be quite basic just because of the time period then, so mostly wooden and perhaps some metal pieces, but before that here is an image of the almost completed interior at this point.

I feel that it is coming along quite nicely, certainly for the style that is being designed to support, which is original rustic housings back then. The other element to this is of course the bridge between the walk way beam and the wall to the look out, All I did to make this was get a simple cube and resize to the a slender plank and then angle it correctly so that it matches and aligns with the wall and beam after deleting the polygons and design it as another walk way and then I copied it and dragged it across to the other walk way to finish that part and then worked on the outside.

Here is the other walkway.

The task as I said was to finish the outside.
As you can see there is a walk way that I made out of extrude and then using another cylinder I created a simple beam for support, which again will be a handy thing to have for the free roam experience and parkour element.

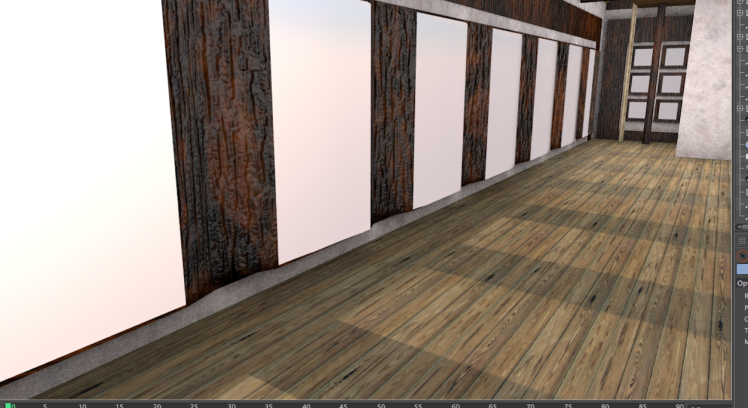
Here is the final image for this side of the building after I added the wall textures and finalised the wall facing and wooden frames. I am very impressed with the final render of this building.

Here’s the finished interior.

After this I have added a few finishing touches to the exterior of the main hall, for example you see that see through part of the wall I have added a new window, but it will be a flat window without textures and if you noticed the light coming through and that is because i have added a couple more windows that pop in and allowed a wooden border on the outside.
Due to further considerations, I felt it looked better without the window.

Unfortunately I did this without documenting any images but I can tell you that I simply used the extrude tool but rather than just clicking somewhere and dragging I dragged from the actually arrows and made a folded in shape to break the wall in to create the shape the only problem is that it looks rather odd when it’s folded. Here’s the image.

This is something that I will have to work on, but for now I am going to sort out the roof structure and what I am going to do is place some cylinders that where condensed down and used for holding up the walkway ledges and I have turned it around using the swivel control and resized it to fit the wall to wall space and then shrunk them down a bit but so that they look sturdy and then I duplicated it and created another 12 beams. The roof is more or less completely I may go back to it later on to double check the features.

Then I moved onto the main building that would be used as a home or hideout, there won’t be any conventional level to the main building it’ll just be a couple of bunk beds or platform beds that come out of the wall or perhaps strung up, depends on what looks better. On the main building so far i have decorated the outside by simply adding the stone texture and then some wooden framing and added a wooden flooring on the inside to match the main hall. Here are the images below.

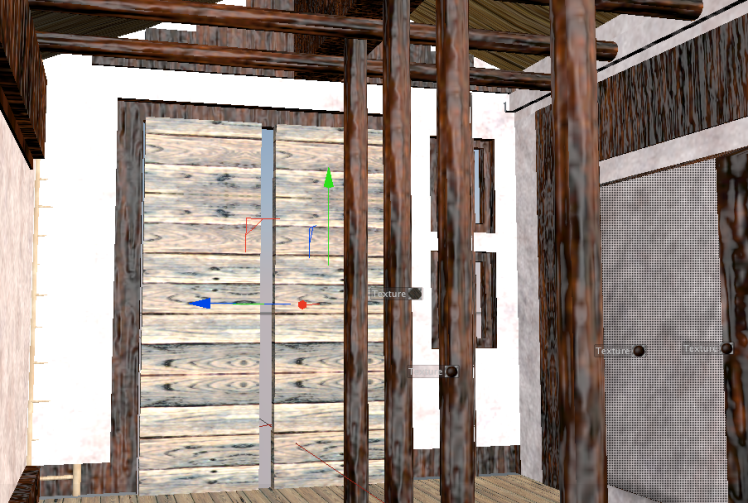
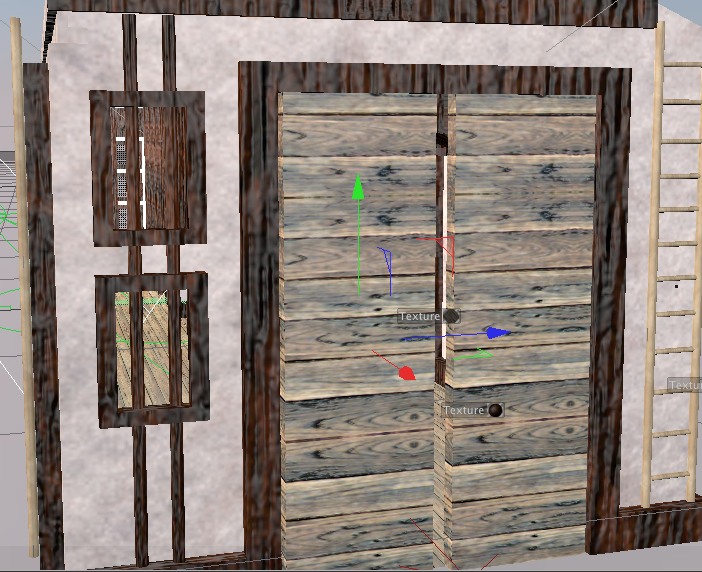
The next part is the inside wall the connects the walls of both buildings together to create a door way through to each other, but I’m also putting a larger window so that there is another viewing port for focusing on the ladder going upstairs to the office and bedroom. So far I have done the actual window and door way and added a texture of wood to it.

After the window and doorway were created I proceeded to make a simple door that will be left open for the camera walkthrough and after that I edited the walls behind it to cover up the extrude that I used on the framing.

As you can see it has turned out as good as usual and looks a lot better than just leaving an empty void.
Now I am going to focus on the front of the hall purely because that will be one of the last elements to finish on this building and there will also be an open door on the front for the camera to come through and allow you to view inside. I will update as I progress with this.
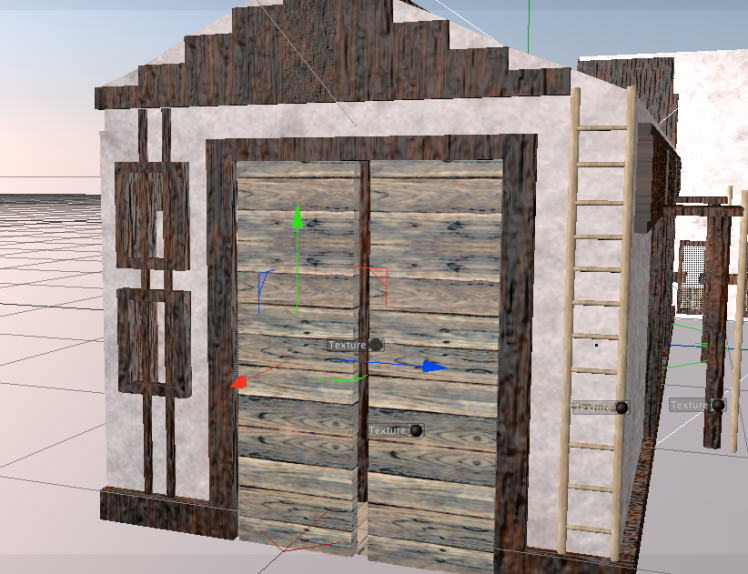
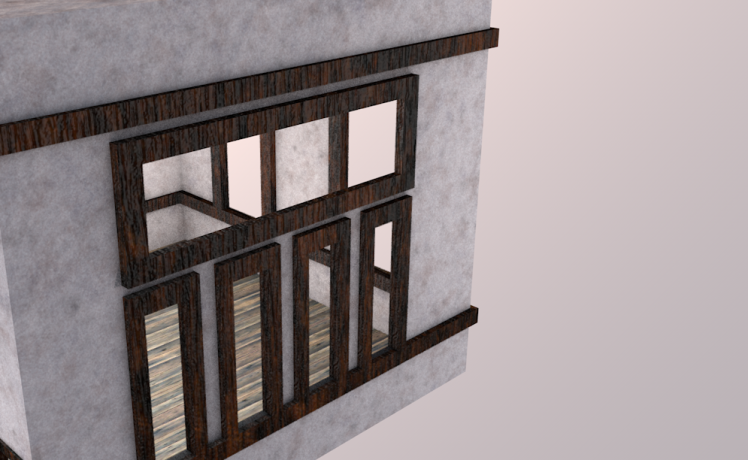
What I have done so far is I have used the extrude tool to bring the front of the surfaces out and made a small border around the doors and made a few open windows with some poles going through them as another original effect and I’ve added a ladder on the side so that during the game, it allows the character to climb the building that way. I have deleted the middle of the windows and the doors and made some accessible doors for the walkthrough video.
So far I have done the above I just need to add the bridging inside the frames and finalise the front end of the building this will be the exterior pretty much complete with regards to the main hall, then it’s just the main home that needs to be finalised.

Here is the final image of the completed front interior.


Last thing is to finish the doors, I made them out of simple cubes and shrunk them down to the appropriate size that was need and added some metal rings by using the torus stencil and resized them and placed them onto the doors to make handles.

After going through the main hall I would say for the exterior and interior design of the building, that this is pretty much finished on this segment the last part is the main home and the surrounding environment.
I have started by adding a little bit to the roof of the building and in doing that I have added a ladder leading to it and a little marksman spot for you to practice archery in the game and incase anyone tries to attack your home.
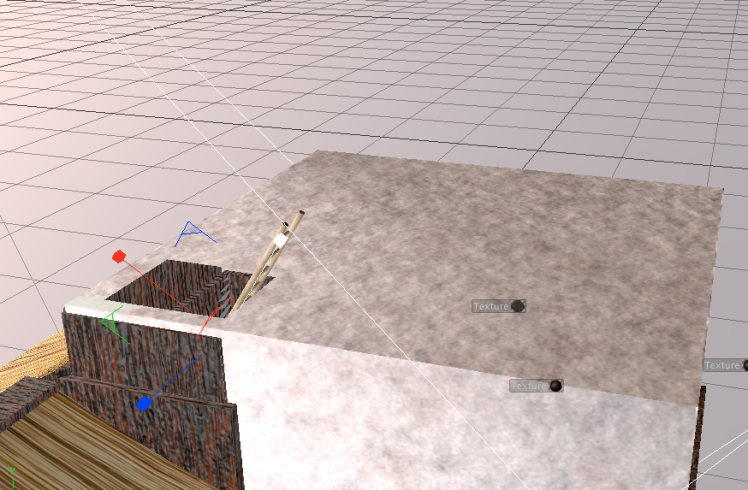

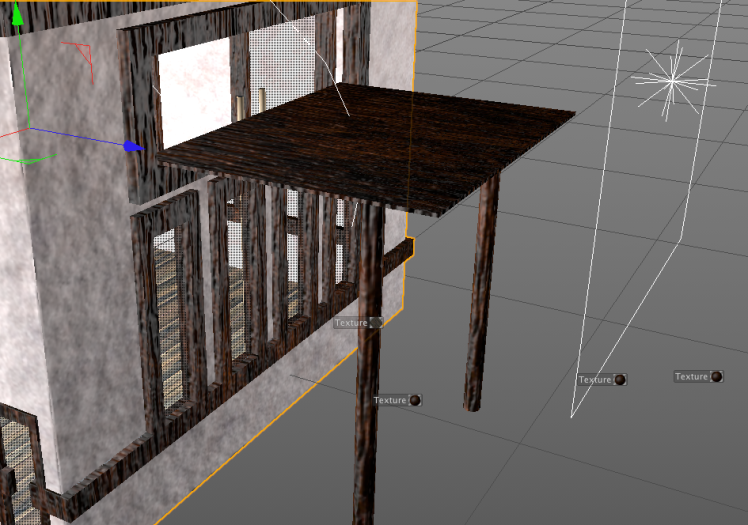
I’ve added a wall around the hole and levelled the ladder out with it. I’ll add some furniture into that room later, but I’m going to focus on the outer wall on the main home, this includes the walls and adding a new vantage point for viewing with a ledge and a ladder inside and adding a couple more windows on the rear of the house, I’ll also add the wooden texture to the borders and make the platform wooden as well. This is another simple case of extrude and inner extrude. Here is the back wall with the new windows added, as you can tell they are a very paranoid family.

Very basic but considering the story is of a rich family in a simple time, you would generally expect the windows to be quite basic, I am considering putting some shrunken cylinders and placing them in the middle for support, similar to the windows that are at the front of the house. Here is the new viewpoint.

To create the ledge I just used a cube and shrunk it down to the right fitting and added one of the cylinders underneath it for support.
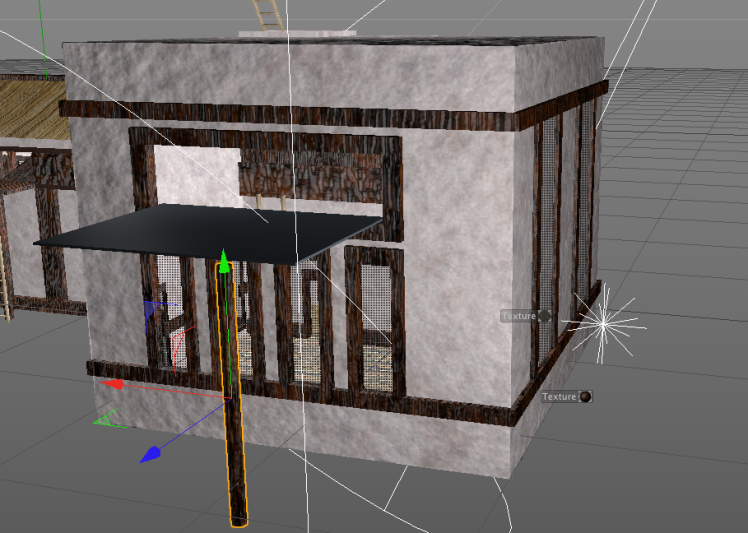
I added two poles instead of one for more support to the platform.

In these two images I have created a set of stone beds that are coming out of the wall with wooden supports and added some pillows, very basic but for the size of the family, it is necessary to have this many. How I created the pillows was I added a subdivision surface to a cube to make it more smoother and copy and pasted them to each bed.

Here is the complete set of beds. No blankets as the family in the game don’t believe in having blankets as it leaves them vulnerable and that will become a key focus point to the game storyline.

Here are the complete beds.

For a start as I am nearing the end of my creation so I have added in a plane and spread it out to suit the space that I wanted and added a dirt texture for the moment. I just have the final pieces of furniture to add inside.
Before I do that though I have added a tube shape and cut out the centre to make a well of water as another little touch.


I added a water texture into the well and then added a pebble texture inside the well for a bit more of an effect just as another feature in general.
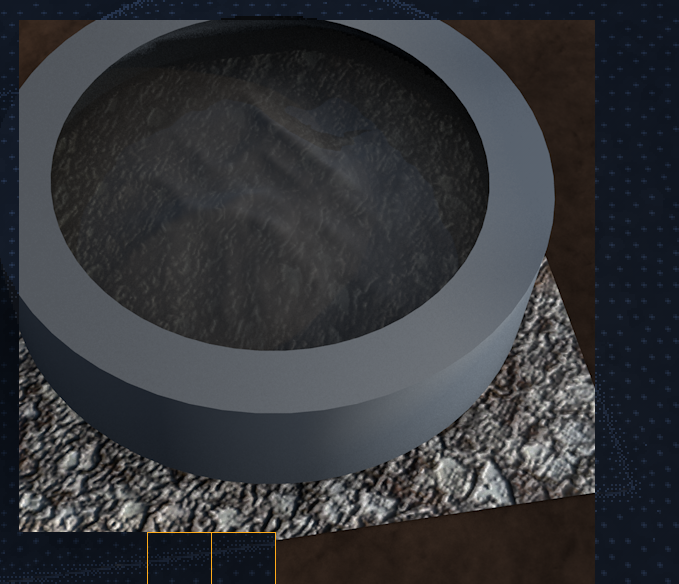
Here is the finished product after the final texture was added and rendered.

I’ve also added a path to the well, it looks fairly basic and original for the time period that this is set in so I’m not bothered by the rocky flooring or stone wall texture and the lighting hits it perfectly for the glazed water effect.
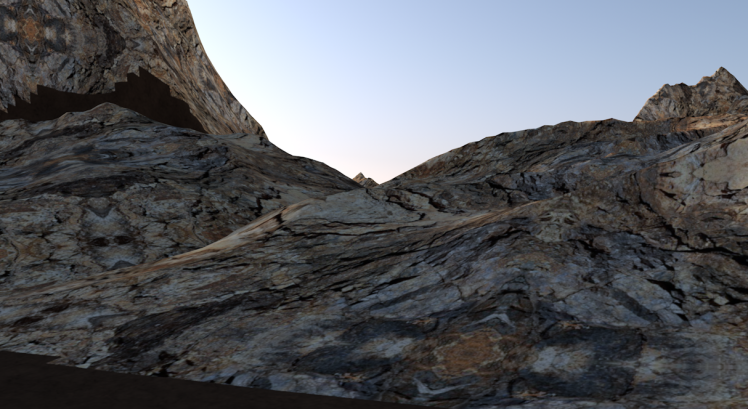
The next part of the final stages is to set up the rocky mountains and mud patches throughout them, all I did for this because the house is isolated, I got a landscape stencil and duplicated it eight times and added the mud texture that was on the plane stencil underneath the house then I extended some of them and joined them together to make an isolated area for the house and using an image online and transferring it to one of the texture mats on Cinema 4D, I managed to add very convincing rocky texture that fits the time frame perfectly.


Here are the final mountains and I think that they look awesome, very unique texturing and one that I did have to have a play around with to make sure that I got the right pigmentations and styling because this game is going to one of a photorealistic style and this will certainly help me to give it that little bit more of reality to it.
One little touch that I felt would be an feature would be to add gravestones into this environment because of the disturbing past that the family has, it would be quite a unique style if the killers kept the bodies of the dead buried around them, especially if they are isolated in the mountains.
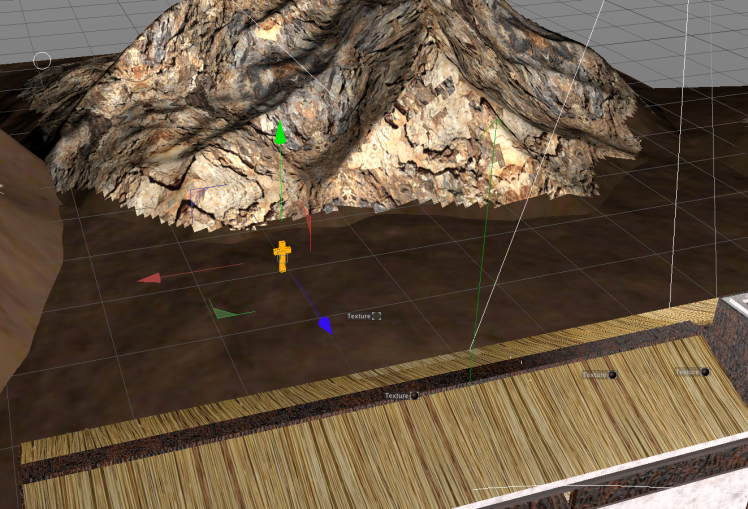
The second one is of the tombstone out in a desolate wasteland. How I made the cross for this part was I got a cube and shrunk it down to the necessary size that was needed to make the cross look fairly average and then measured both side correctly to match and using the bridge tool, I made the spaces come together and turned them into a proper cross.


To get the right texture though I had a look online to find an appropriate image of the wood and added that to a new mat and merged it with the cross to create that final texture.
What I am going to duplicate that and make a graveyard out of them to add another side of darkness to the family and the story to show that the family like to bury their kills, but because they are isolated and in the middle of nowhere it doesn’t matter that they have several graves everywhere. Here is the image of the duplicated headstones.
As you can see I have added some lumps out of the ground to add that little bit more of an effect because when you dig up dirt and then resurface it it always leaves a bump in the space. To do this I used duplicates of the pillow shapes I created earlier and changed the texture colour on them.

Here is the finished image.
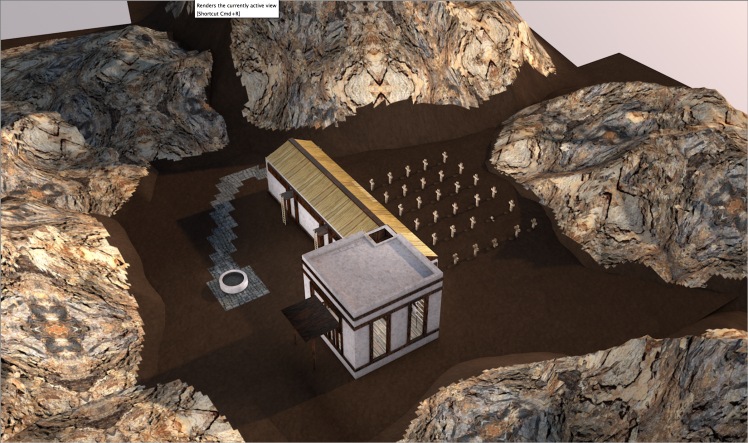
I am very impressed with the final outcome of this environment, just the last few touches with double checking the colours and textures are where they need to be and to lastly add some tables into the hall and that is this environment complete.
Here is the gravestone of the the main character in the future of the game.

Lastly is just adding some tables inside the main hall, I have done this by getting a simple cube and extruding the corners underneath and multiplying them by just simply copy and pasting this included getting the length correct and adding the right texture that didn’t clash with the wooden textures already used for the main building and hall. You can see the process that has been used throughout a lot of my environments creations, but I have put some images up of the creation of it and the process to finalising them.
Before getting to this point, I had to remodel it’s size and stature and then add the right texture, I made the chair out of a duplicate and then shrunk the size down even more for the base and then using the extrude tool highlighted points in the corners at the back and dragged them up a few times to create some barriers and the using the spaces I made then dragged them towards me from the angle below and joined them up with the other side and there we have a chair.

Here is the rendered image of the chair and table.
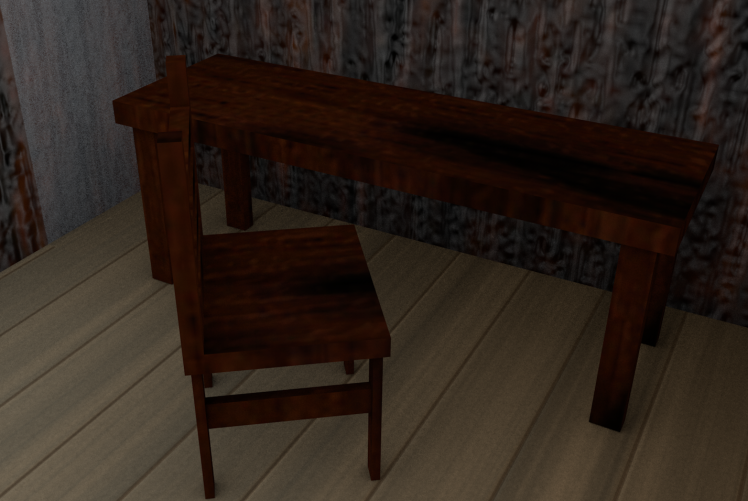
May need to add some form of lighting as it is a bit dark but I am adding multiple forms of light everywhere and this is in the area with the ladder but I’ll see how everything looks with the final renders. Here below you will see the final images of rendered areas on my environment.

I added a physical sky into my environment and included fog for extra detail and effect.


However before I go for the final renders and frame productions to make it into a movie I had to compare the rendered images with and without Global Illumination to see how this affects the timings of rendering and the quality of them together, below is the image of the render with the Global Illumination.

Now in comparison here is the image of the same scene without the Global Illumination. As they stand there doesn’t seem to be a noticable difference except for the fact that the image without Illumination is that the shadowing is bolder and more noticable whereas it looks more faded with the Illumination on.

I have chosen to take out the Global Illumination as it slowed down the rendering to roughly one frame every 5 – 7 minutes which was too slow for what was actually in the walkthrough and final images and after taking it out as i mentioned above it looks a lot better and renders much quicker. I kept Ambient Occulusion as it kept that foggy, atmospheric appearance to it.

Once I had settled on the overall appearance that would almost polish it up and finalise those finishing touches I had to change a few render settings that are suited and equipped to my needs for the final render, so what I did was into the drop down menu that says “standard” above the sections and after a few conversations with a few people I decided to just stay with the standard render as there wasn’t much need for any special effects within my environment as it is really basic but effective enough with the inclusion of the tombstones and the textures, just small little things that make the impact for me.
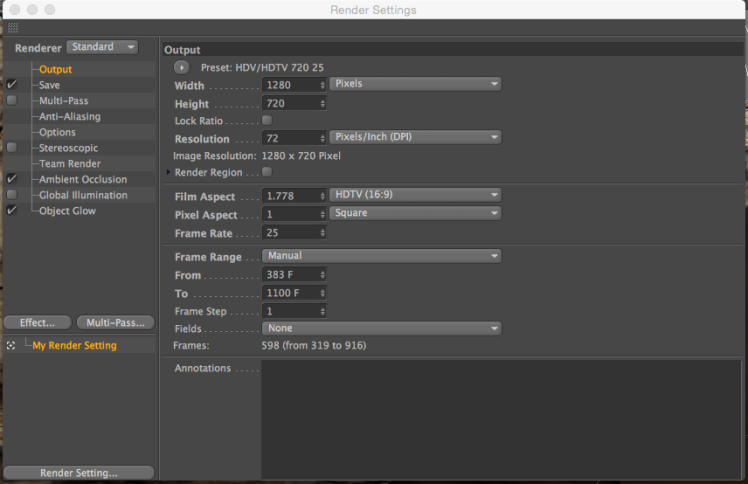
The next thing I had to do was the set the specifications for the render and to do that I went to the “output” option and started with the “width” as there needs to a set number of pixels which effects the quality of your image the width that the screen will be in inclusive of the height. I set mine to 1280p and I believe a 720p in height and I did this because I needed to ensure that the render timings weren’t going to be ridiculous and to ensure this I not only made sure that the Global Illumination was turned off but the definition was set to a lower standard to render quicker but to compensate for this I fine tune the quality in After Effects to the a higher resolution.
So in the end it was rendering to from about 40 seconds a frame to 1 minute a frame, which was a reasonable render time regardless of the detail in the environment itself. Once that was done, I then turned of lock ratio as that wasn’t necessary and kept the resolution as it was.

I altered the film aspect to (16:9) HDTV and the frame rate for the rendering to 25 and the frame range to “all frames” to start with but I did my rendering in about 11 hours and over two days with breaks in between them. I set the first render from 0 – 318 on the first day and then continued from 319 to the last frame which I believe was 916, however it did confuse me a little because the frames that I had created initially was 1100 frames from doing the camera walkthrough. Then I realised that it came with the changes to the pixel settings and film aspects which lessened and conjoined some of the frames.
After that I double checked everything and then closed the window down and then I went to the second option along the image above and selected “render in picture viewer” which will start the process and then you can view your images being rendered. Once this process was complete i saved it to my memory drive which would then lead to me having to create the final movie inside of software called After Effects.
Once I got into After Effects, the process was pretty simple, I started on a new save and went down to file and import then selected only one of the images (first one) and that was inside of the morphing box where you can move images and files if you need to and then I dragged that down to the video management box as and then I found that once I did that, all of the rendered stills were in there with the one image that I had selected which saved me a lot of time so I didn’t have to do this for all of them.


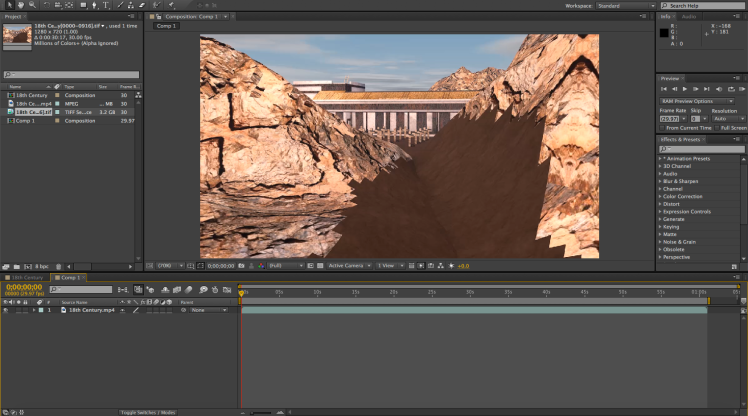
Then I had to find a way to choose the format I wanted and to do that I went to composition and selected “render” and I had to change the area that said “loosen” I believe and from there I changed it to …………. and from there I saved it into the correct memory container and then proceeded to start the render and once it was completed I just simply closed down the program and once it was converted to an MP4 video save, I was able to upload it to my YouTube account to finalise the process of creating this 3D environment for the world to see. Below this step by step walkthrough you can find the link to my video embedded in a link.
Here for the purposes of the render and to back up my video somewhat, here are a few from certain aspects and points of the environment.
